Trying new methods and hacks is usually one of developers favorite things to do. Recently i found a webcam/CAM,i already have laptops cam but the one i found is external and have about 1 yard of cord which you can connect to USB port to use cam.So i really wanted to use that as security camera/CCTV to start using it as security camera.
The First thing i have to find is to check either this CAM is supported by linux. To find out you can use couple of Linux commands
Checking dmesg
virgo@virgo-pc:~$ dmesg

: :

[ 6793.347377] usb 1-1.1: new high-speed USB device number 8 using ehci-pci

[ 6793.441332] usb 1-1.1: New USB device found, idVendor=1908, idProduct=2311

[ 6793.441353] usb 1-1.1: New USB device strings: Mfr=1, Product=2, SerialNumber=3

[ 6793.441355] usb 1-1.1: Product: USB2.0 PC CAMERA

[ 6793.441356] usb 1-1.1: Manufacturer: Generic

[ 6793.441358] usb 1-1.1: SerialNumber: 20100331010203

[ 6793.442016] uvcvideo: Found UVC 1.00 device USB2.0 PC CAMERA (1908:2311)

[ 6793.442838] input: USB2.0 PC CAMERA as /devices/pci0000:00/0000:00:1a.0/usb1/1-1/1-1.1/1-1.1:1.0/input/input17
to confirm the video device i tried
virgo@virgo-pc:~$ ls -l /dev/video*

crw-rw----+ 1 root video 81, 0 جولاي 25 16:08 /dev/video0

crw-rw----+ 1 root video 81, 1 جولاي 26 18:18 /dev/video1
so its showing two video device first is my laptop webcam and second is the external webcam it mean that the external device is supported.
you can also view the connected devices on usb by using command lsusb
virgo@virgo-pc:~$ lsusb

Bus 002 Device 002: ID 8087:0024 Intel Corp. Integrated Rate Matching Hub

Bus 002 Device 001: ID 1d6b:0002 Linux Foundation 2.0 root hub

Bus 001 Device 005: ID 0c45:6473 Microdia

Bus 001 Device 004: ID 0a5c:21e3 Broadcom Corp. HP Portable Valentine

Bus 001 Device 003: ID 0e8f:00fb GreenAsia Inc.

Bus 001 Device 010: ID 1908:2311 GEMBIRD

Bus 001 Device 002: ID 8087:0024 Intel Corp. Integrated Rate Matching Hub

Bus 001 Device 001: ID 1d6b:0002 Linux Foundation 2.0 root hub
you can match you dmesg log and lsub output to find out the device. In my case that is 1908:2311
from dmesg
[ 6793.441332] usb 1-1.1: New USB device found, idVendor=1908, idProduct=2311
from lsubs
Bus 001 Device 010: ID 1908:2311 GEMBIRD
So if you want to test your CAM without installing any additional package you can use VLC[almost all pc have it :)] to view CAM output
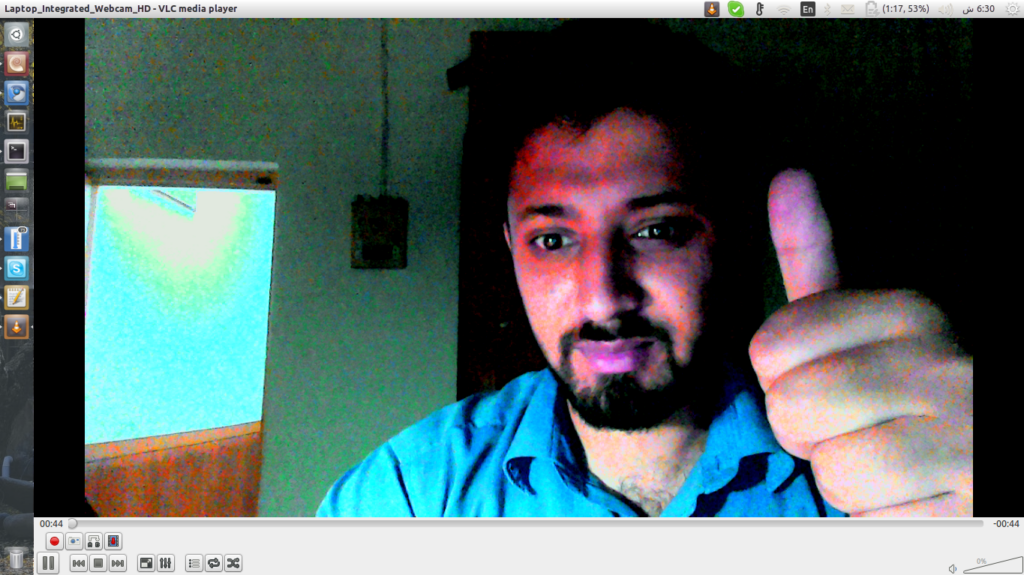
Open vlc and click on the video devices from the list on left side i can now see two video devices here too. so why no you want to check it? watch the live capture by just clicking the cam.
This is my laptop cam live capture
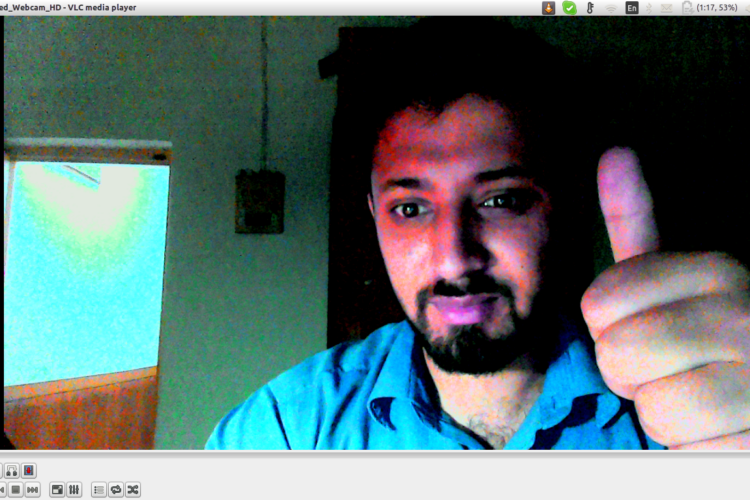
and this is external cam live capture.
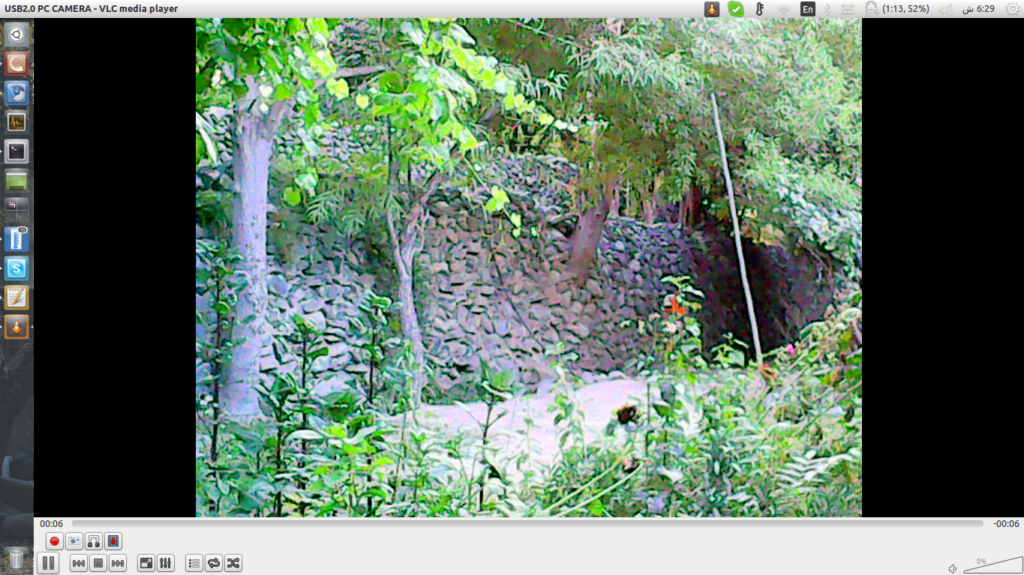
Ok now the external camera is working and i need a bash script to capture images automatically as i cannot record the live capturing feed with VLC because it will eat lot of disk space.you can record live capturing with the VLC if you are interested.
I am very new to bash so i searched few articles and found one useful and related.
http://www.netinstructions.com/automating-picture-capture-using-webcams-on-linuxubuntu/
this article list different methods to capture images automatically, it worth reading have a look at it, the approach use in this article is to use CRON job and unfortunately the minimum time you can schedule with CRONJOB is 1 minute means 60 seconds so in 60 seconds you can miss lot of events happening due to this i make few more searches on google and found that i can use the combination of infinite loop and sleep to capture images in seconds. This approach was in my mind but as i said i am very new to bash to i didn’t knew i can use loop and sleep in bash 🙂
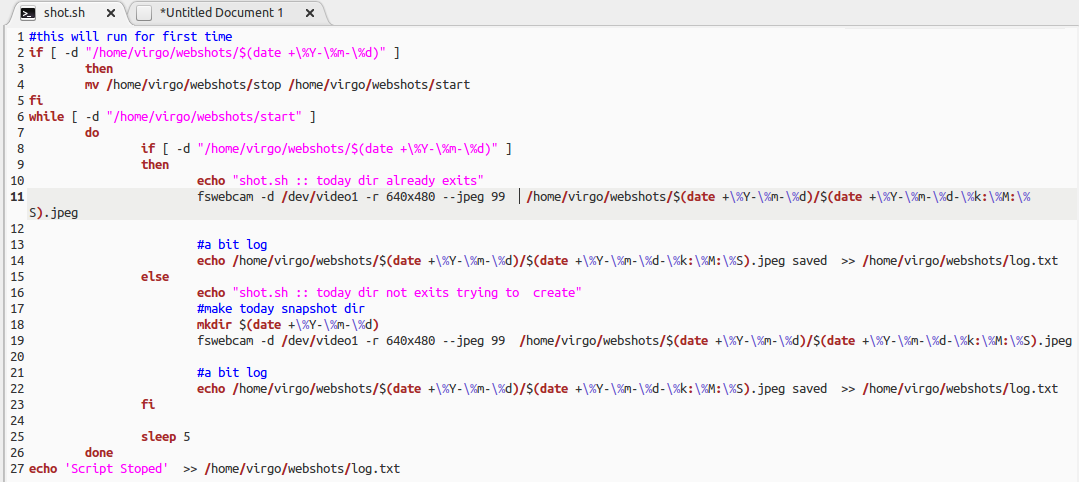
After reading the above article and few other i write a code which works well and is according to my need.Here is the bash script that i wrote which is saved in a directory called webshots under my home directory as shot.sh
Directory Path:
/home/virgo/webshots/
#this will run for first time

if [ -d "/home/virgo/webshots/$(date +\%Y-\%m-\%d)" ]

then

mv /home/virgo/webshots/stop /home/virgo/webshots/start

fi

while [ -d "/home/virgo/webshots/start" ]

do

if [ -d "/home/virgo/webshots/$(date +\%Y-\%m-\%d)" ]

then

echo "shot.sh :: today dir already exits"

fswebcam -d /dev/video1 -r 640x480 --jpeg 99 -F 1 /home/virgo/webshots/$(date +\%Y-\%m-\%d)/$(date +\%Y-\%m-\%d-\%k:\%M:\%S).jpeg
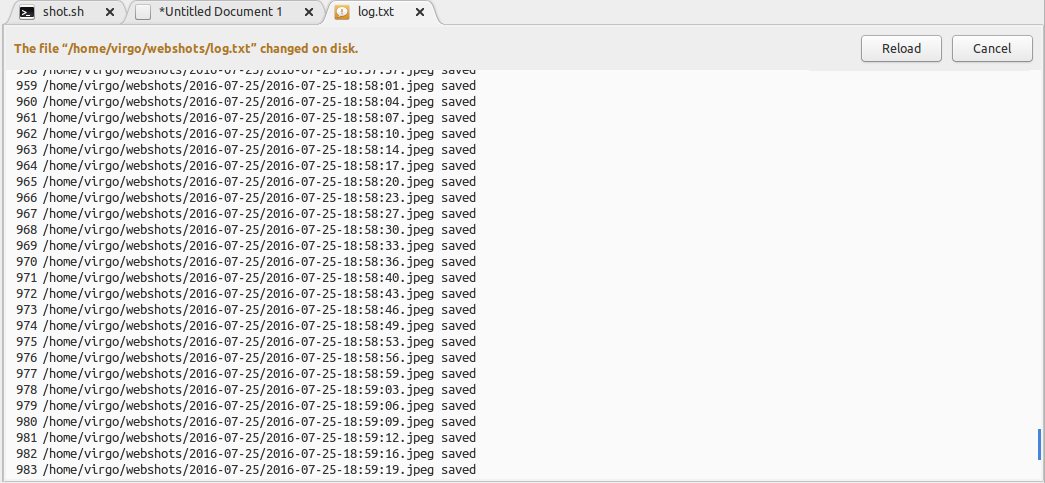
#a bit log

echo /home/virgo/webshots/$(date +\%Y-\%m-\%d)/$(date +\%Y-\%m-\%d-\%k:\%M:\%S).jpeg saved >> /home/virgo/webshots/log.txt

else

echo "shot.sh :: today dir not exits trying to create"

#make today snapshot dir

mkdir $(date +\%Y-\%m-\%d)

fswebcam -d /dev/video1 -r 640x480 --jpeg 99 -F 1 /home/virgo/webshots/$(date +\%Y-\%m-\%d)/$(date +\%Y-\%m-\%d-\%k:\%M:\%S).jpeg
#a bit log
echo /home/virgo/webshots/$(date +\%Y-\%m-\%d)/$(date +\%Y-\%m-\%d-\%k:\%M:\%S).jpeg saved >> /home/virgo/webshots/log.txt
fi
sleep 5

done

echo 'Script Stoped' >> /home/virgo/webshots/log.txt
I am also uploading the code snap.
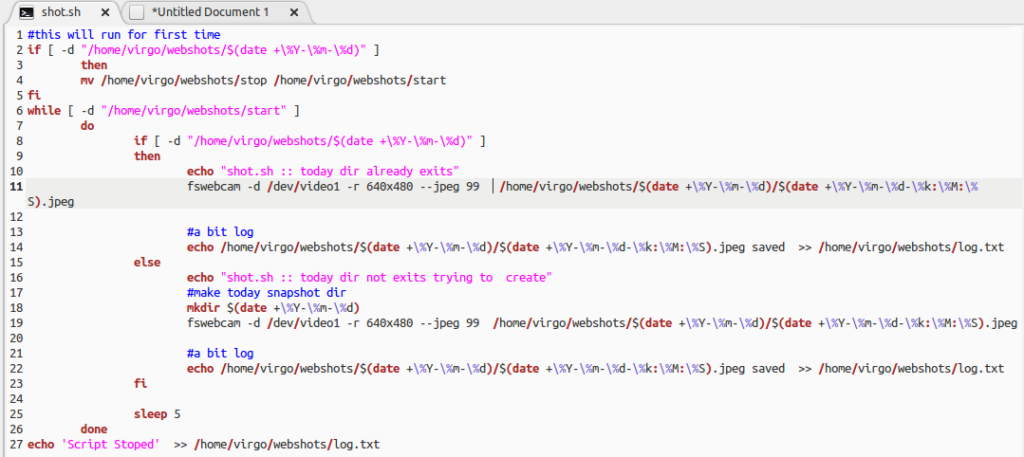
Basically i am using fswebcam to capture images after each 5 seconds.the good thing about fswebcam is that it automatically overlays date on image.
the script first check a directory named stop if that found it is renamed and starts. I use this to control script ,to stop when it is running in background.
Next step i am querying that is their a directory named start in /home/virgo/webshots ? the script will run as long as their is a directory named start once you renamed start directory to something else the script will stop running.I rename this directory to stop which stops the script. so there must be start directory to keep script running.
Next is to keep the images according to day,to do this i am querying a directory name for today if that exists that mean script had created the directory already and the date is not yet changed ,when the date changes it will automatically create directory for that day, so keeping the shots grouped by day.
that’s it. now i now run the bash script from terminal to start capturing. you must change the script mode to executable before you run it .
virgo@virgo-pc:~/webshots$ chmod +x shot.sh
Executing the code
virgo@virgo-pc:~/webshots$ ./shot.sh

shot.sh :: today dir already exits

--- Opening /dev/video1...

Trying source module v4l2...

/dev/video1 opened.

No input was specified, using the first.

--- Capturing frame...

Captured frame in 0.00 seconds.

--- Processing captured image...

Setting output format to JPEG, quality 99

Writing JPEG image to '/home/virgo/webshots/2016-07-25/2016-07-25-19:13:35.jpeg'.

shot.sh :: today dir already exits

--- Opening /dev/video1...

Trying source module v4l2...

/dev/video1 opened.

No input was specified, using the first.

--- Capturing frame...

Captured frame in 0.00 seconds.

--- Processing captured image...

Setting output format to JPEG, quality 99

Writing JPEG image to '/home/virgo/webshots/2016-07-25/2016-07-25-19:13:41.jpeg'.
Yes yes i know so if you want to run script in backgroud you have to run script like this
virgo@virgo-pc:~/webshots$ ./shot.sh &>/dev/null &

[1] 18684
so the output for this is the PID which is process id. you can use this id to terminate/kill script
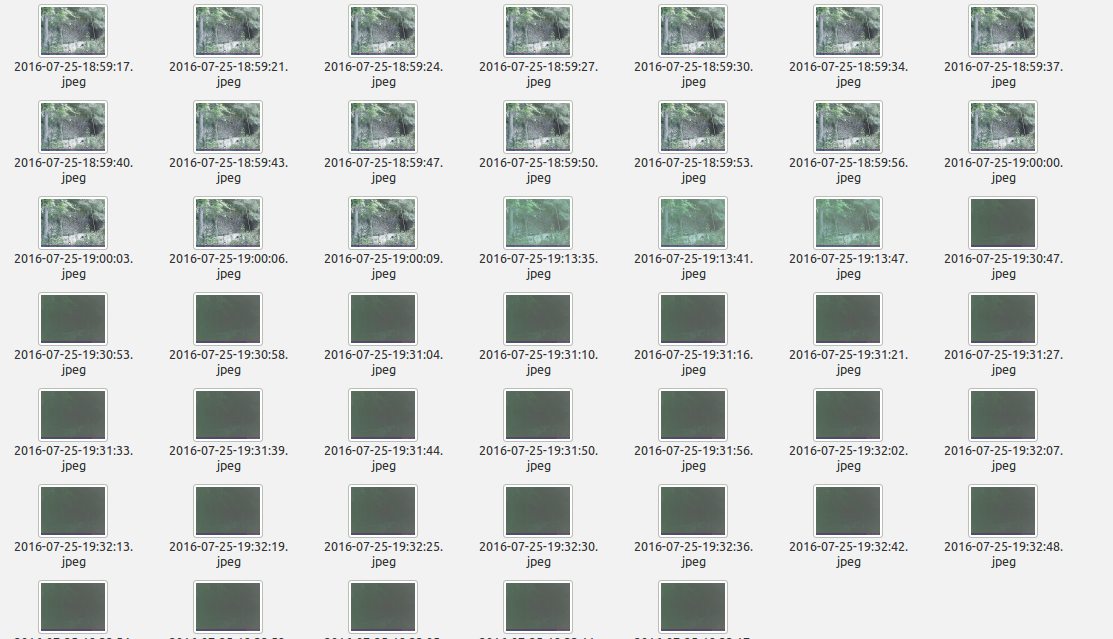
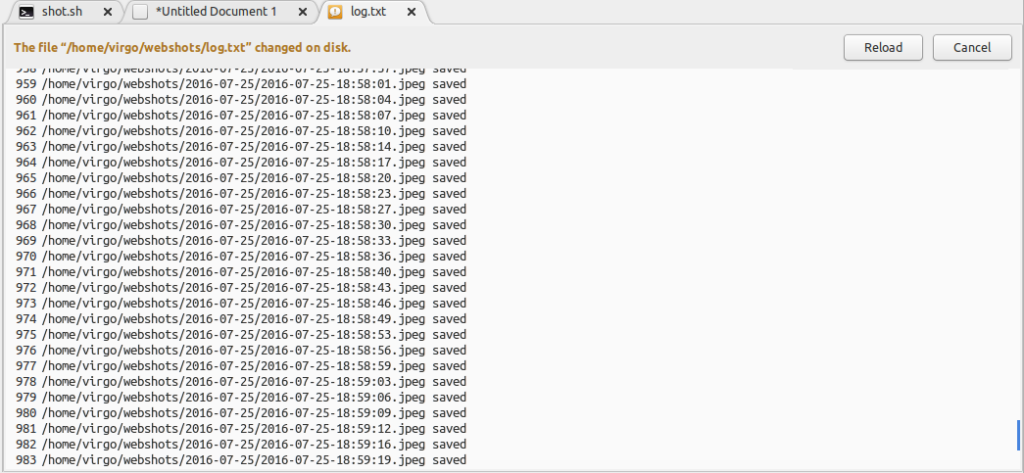
You can confirm the script execution by the folder generated for today and the on going image capturing each 5 seconds, also the log file which change each 5 seconds.
Directory Created For today
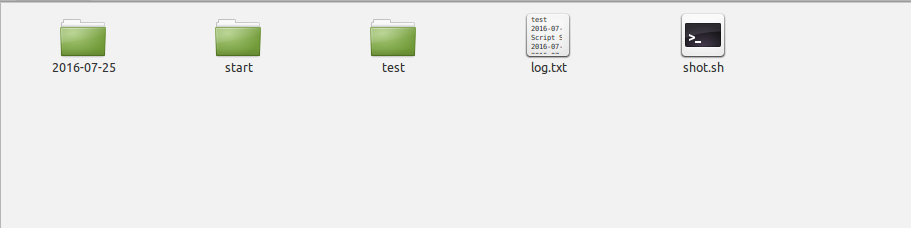
Images Capturing in progress

Log for images
If you had followed along you have successfully converted and external cam to a CCTV Camera
the usage of script is not limited to only CCTV Camera you can also use this script to capture the shots using laptop camera when someone tries to access some folder or tries to login into your account 🙂 that may be my next micro project 😛
Note: this was a learning project for me in case i had made any mistake or you want to share your feedback with me ,fell free to comment.